Transforming your living spaces from drab to fab can be a no-brainer. Do you know how? One of the most effective and robust options available today is vinyl plank flooring. It’s not just sturdy and stylish, but relatively easier to maintain.
However, you do have to figure out the right installation technique, so knowing how to stagger vinyl plank flooring becomes of utmost importance for achieving a visually alluring and impeccable design. This guide will walk you through the steps to ensure maximum impact through effective staggering techniques.
Understanding the Basics of Staggering
Staggering is essential for creating an aesthetically pleasing and functionally good space, which involves arranging the planks in a way that the seams do not line up in a straight line to enhance the overall look and stability of the floor.
Now, you may ponder: “How to stagger vinyl plank flooring? Voila! We have got you covered. Here’s a run-through of techniques for all you DIY enthusiasts. Remember, it is the technique that can significantly turn around our place.
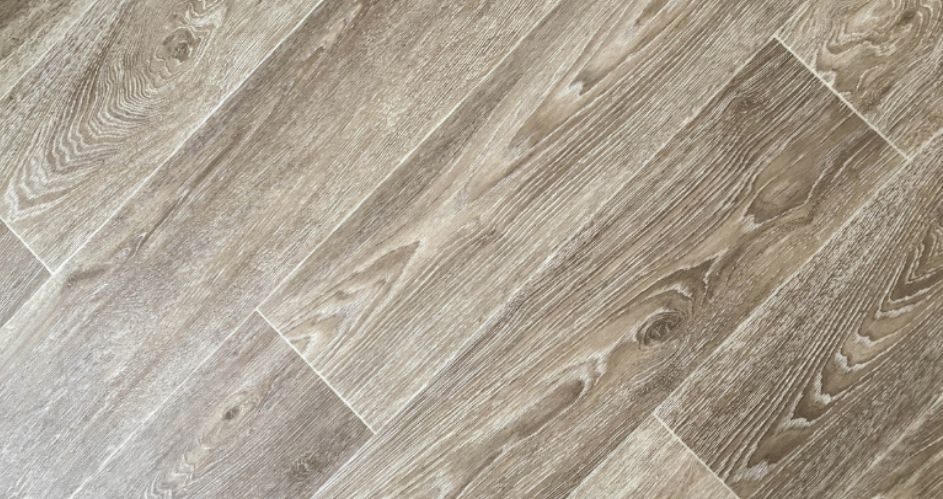
The two most popular patterns of laying vinyl plank flooring are staggered and straight. However, the staggered pattern is more popular among the two. The visual appearance is much more impressive than the staggered straight pattern of vinyl plank flooring. The staggered pattern looks natural, and chances are less likely to show.
How to stagger vinyl plank flooring?
Staggering vinyl plank flooring is crucial for both aesthetic appeal and structural integrity. Let’s take a dig into a step-by-step process:
Introduction to Vinyl Plank Flooring Staggering
Vinyl plank flooring has gained popularity due to its durability, affordability, and easy installation. Staggering refers to the arrangement of plank joints to create a visually appealing pattern while also providing stability to the floor.
Proper staggering helps distribute weight evenly and prevents the formation of weak points that could lead to premature wear or damage.
Tools and Materials Required
Before you begin staggering vinyl plank flooring, gather the necessary tools and materials:
- Vinyl plank flooring
- Measuring tape
- Pencil
- Utility knife
- Straight edge
- Tapping block
- Rubber mallet
- Spacers
- Safety glasses
- Knee pads (optional but recommended)
Preparation
#1. Acclimate the Flooring: Allow the vinyl planks to acclimate to the room’s temperature and humidity for at least 48 hours before installation.
#2. Prepare the Subfloor: Ensure the subfloor is clean, dry, and level. Remove any debris or protrusions that could interfere with the installation process.
Staggering Vinyl Plank Flooring: A Step-by-Step Guide
#1. Start with a plan: Measure the length and width of the room to determine how many planks you’ll need and how they’ll fit. This will help you avoid awkwardly small or narrow pieces at the edges.
#2. Establish a Starting Point: Begin in the corner of the room opposite the main entrance. This provides a natural flow and minimizes visible seams.
#3. Lay the First Row: Place the first plank in the corner with its tongue facing outward. Use spacers to maintain a consistent expansion gap along the walls. Cut the last plank in the row as needed to fit.
#4. Stagger the Joints: For the second row, cut the first plank in half and start with it. This creates a staggered joint pattern, similar to brickwork. Continue staggering the joints for subsequent rows, ensuring that no adjacent end joints align.
#5. Randomize Plank Lengths: Vinyl planks often come in various lengths. Randomize the lengths as you install them to create a more natural appearance.
#6. Maintain Consistent Spacing: Use spacers to maintain consistent spacing between planks and walls. This allows for expansion and contraction without buckling or warping.
#7. Cutting Planks: Measure and mark planks for cutting using a pencil and straight edge. Score the plank with a utility knife and snap it along the line. Use a tapping block and rubber mallet to secure the cut plank in place.
# 8. Staggering Around Objects: When installing planks around doorways, vents, or other obstacles, carefully measure and cut the planks to fit. Remember to maintain the staggered joint pattern.
#9. End Rows: As you near the end of the installation, measure and cut planks to fit the remaining space. Leave an expansion gap along the final wall and cover it with baseboard or quarter-round molding.
#10. Finishing Touches: Once all the planks are in place, remove the spacers and install any transition strips or molding required for a polished look.
Tips For Maintaining The Freshly Installed Flooring:
Clean it daily, and use a soft vacuum or broom with an attached brush to remove the dust and dirt. Removing tough stains is all the more essential for an overall great feel. and experience.
Removal of stains can be easily done by mixing warm water with a neutral cleaner in a bucket. Mop it with a clean towel over the stained area.
Make sure not to use wax or polish on the vinyl plank flooring, as that can harm the finish over time.
Ensure to use cardboard or sliders under the heavy furniture if it needs to be moved. Vinyl flooring can get damaged from scratches and indentations.
- Clean vinyl plank flooring regularly using a damp mop or vacuum with a soft brush attachment.
- Do not use harsh cleaners that could damage the surface.
- Ensure that the floor is dry at all times, and clean up spills immediately to avoid staining.
- Consider placing felt pads under the furniture legs to avoid damage.
- Use rugs or mats at entryways to trap dirt and debris before it reaches the floor.
Maximizing Impact
How to stagger vinyl plank flooring is made easy through this guide. However, the beauty lies in the details. Pay close attention to the room size, direction of light, and furniture placement to stagger the floor with maximum impact on the overall appearance.
Also, remember that the goal is to amp up the beauty of the floor and create a viable space without overwhelming it.
Concluding Remarks
Staggering vinyl plank flooring is not just technical; it’s an art form that can transform your space from drab to fab. By following the above steps and understanding the significance of the stagger, you’re well on your way to creating a stunning and impactful floor that will last for years to come.
Remember, a well-thought-through stagger pattern not only amps up the visual appeal but also contributes to the durability and longevity of your flooring. An even distribution of planks across the floor minimizes the risk of warping and gaps that can occur over time.
Staggering viny planks not only enhance the aesthetic appeal of your room but also ensure stability.
Meticulously planning your layout may take a while and could be time-consuming to execute. However, you achieve a floor that’s not only beautiful but also structurally sound, making your investment worthwhile.