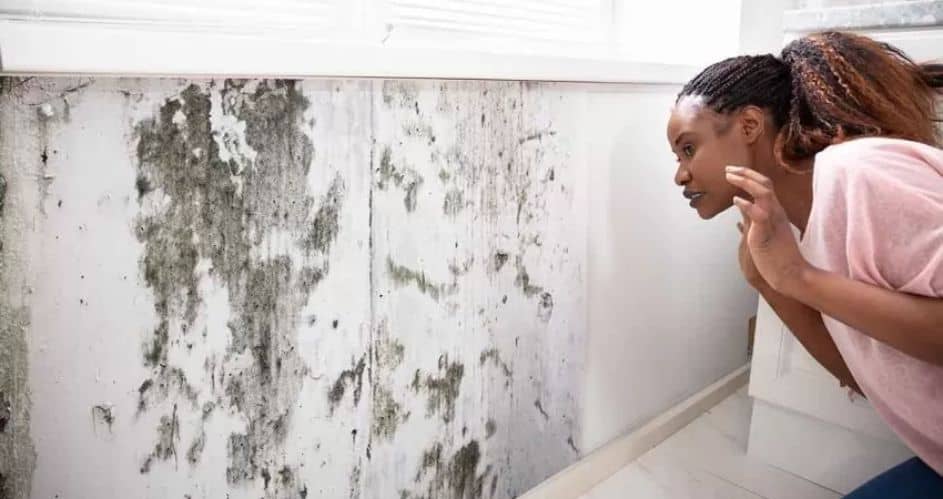
Finding mold growth in your walls can be scary, and you have to take immediate action. Mold has any possibility of harming your family’s health and property. Failure to pay attention to it could lead to more than expensive solutions and a large amount of damage.
Nevertheless, the best way to dry up a mold is not by just wiping it off. Check the six main steps you should go through in case you notice mold on walls.
Taking into consideration these steps, you will not only kill the mold but also prevent it from coming back, thus maintaining a safe and clean living environment with your family members.
Type of Mold Identification
You can begin by determining the kind of mold growing on your walls. Most molds can be broken down into three different types, for instance, green, black and white mould, each with its traits and possible health risks.
For example, black mould can pose a severe threat and requires quite delicate handling. Based on the type of mould you know, you will be able to decide wisely on the removal method and be aware of any possible health-related risks.
If you require more detailed information on the mould type, find a mould expert to evaluate your house. Carrying out the identification, you can practice species-specific mould remediation measures targeted at particular mould species.
Determining the Extent of Damage
It is essential to assess the extent of mould damages prior to the remediation or mould removal plan initiation. Molds can grow significantly fast and can get into not only the surface but also the supporting structure, including the wood stud, drywall and insulation.
Conduct a close overview of the affected region by searching for hidden sources of moisture as well as mould growth spots.
Utilise thermal cameras and moisture meters to see the hidden water damage under the ceiling and walls. Mould remediation and water damage restoration involve considering both visible molds and mitigating the underlying issue of moisture. For this reason, it is essential to determine the extent of the damage.
Implementing Proper Safety Precautions
Adequate safety procedures have to be applied in mould handling to limit exposure and safety concerns. Mould spores may get airborne due to the removal process, therefore increasing respiratory conditions and allergic responses. Get proper safety equipment before the detachment procedure.
This should include gloves, goggles, and a respirator approved for mould spores. With the help of plastic sheeting and duct tape, a barrier can be created to protect the mold from spreading to areas of your house that are not infected.
Remove airborne pollution from outside by ventilating the road properly, opening the windows, and using fans if necessary.
Eradicating Mold and Using New Materials
Having put in place all the essential measures for safety, the next step is to cleanse your walls of any mould and impurities. First, use a solution of detergent and water to scrub the areas to moisten them and loosen and disintegrate the dust spores.
Eliminate stubborn mold stains on your walls with bleach and water solution or a commercial product that is suitable for the type of mould that you have.
A dehumidifier or a fan can be used to remove more moisture and ensure the area is completely dried. Please don’t throw away anything porous or mouldy, including insulation or wallpaper.
Addressing Underlying Moisture Issues
Mould grows the fastest in a moist environment, so controlling the moisture levels becomes the critical factor in preventing further infection or overrun.
Figure out how to deal with the problems with water, which is responsible for mould growth on walls. Mould causes are leaking from plumbing joints, roof leaks, collection of moisture due to condensation, and insufficient ventilation is mainly found.
In such areas as bathrooms, kitchens, and basements that are always humid, make sure that there is enough ventilation or that there are moisture extractor installations. In case of water leaks, fix the problem quickly. To reduce mould growth and keep an ideal humidity level indoors,, by all means,, take the dehumidifier.
Preventing Future Mold Growth
Following your triumph in removing the moulds from the walls, be sure to undertake preventive measures to ensure that the appearance of new infestations is not a possibility in the future. It is not in doubt that mould survives well in watery places.
Henceforth, humidity regulation becomes critical in mould prevention. Install a hygrometer to check the indoor relative humidity, which is not more than 60%.
Provide ample ventilation in bathrooms, kitchens, and other high-H2O areas by employing exhaust fans and opening windows wherever appropriate.
Fill in any cracks or holes on the walls, the windows, and the doors with a sealant to stop water seepage. In addition to the clothes you usually wear, you could try mould-resistant paint or coatings on walls and ceilings as a last barrier.
Conclusion
Lastly, tackling the presence of mould colonies on your walls requires urgent action and diligence on your side. Given the importance of eliminating mould infestations for the health of your home and family, seeking professional assistance and following the simple steps in this article is strongly advised.
Remember, this issue is one part of the general mould removal process; the need to eliminate the real moisture problem and prevent recurrence should also be taken into account.
By identifying, assessing, providing safety, implementing remediation efforts, and taking moisture action, you will be able to get back to a living space that is healthy and mould-free.